

The whole ordeal of trying to get your inventory organized is already a pretty big hassle without throwing in the added nuisance of website sales. So, with that addition, it can be a downright nightmare. How do you track your in-store sales while also keeping a record of all the online purchases? That too, when just the tiniest bit of human error could cost you good business? Well, with our WooCommerce integration, of course! A resource that is now available on RepairDesk 2.0 and RepairDesk Classic!
But how does it work, you ask? Well, you’ve come to the right place because we’re about to tell you just that. The WooCommerce integration mechanism is slightly different for each software, but still pretty simple. So, let’s start with the OG!
Integrating WooCommerce with RepairDesk Classic
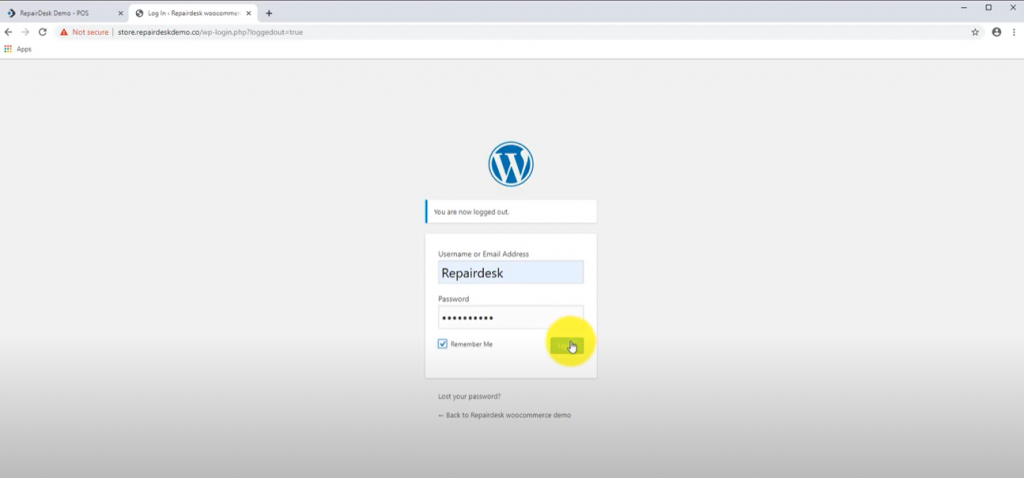
1. To start integrating with your favorite eCommerce software, you must first log in to your WordPress account.
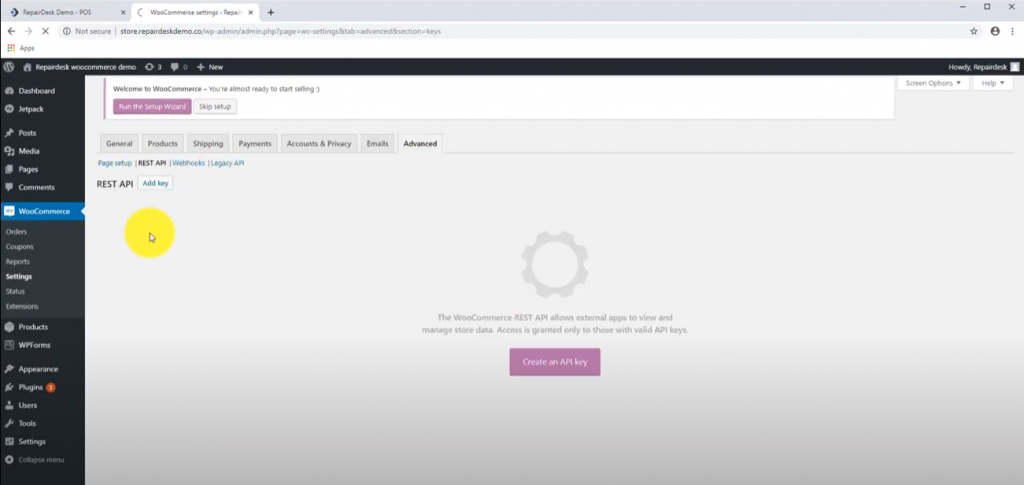
2. Once in, click on the WooCommerce tab at the left of your screen. When you see the dropdown appear next to it, choose Settings on it.

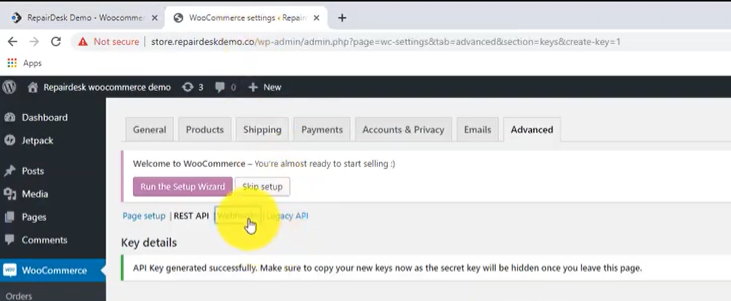
3. Now click on the Advance tab at the top and then choose REST API there. You can either pick Create an API key or simply click on Add key.
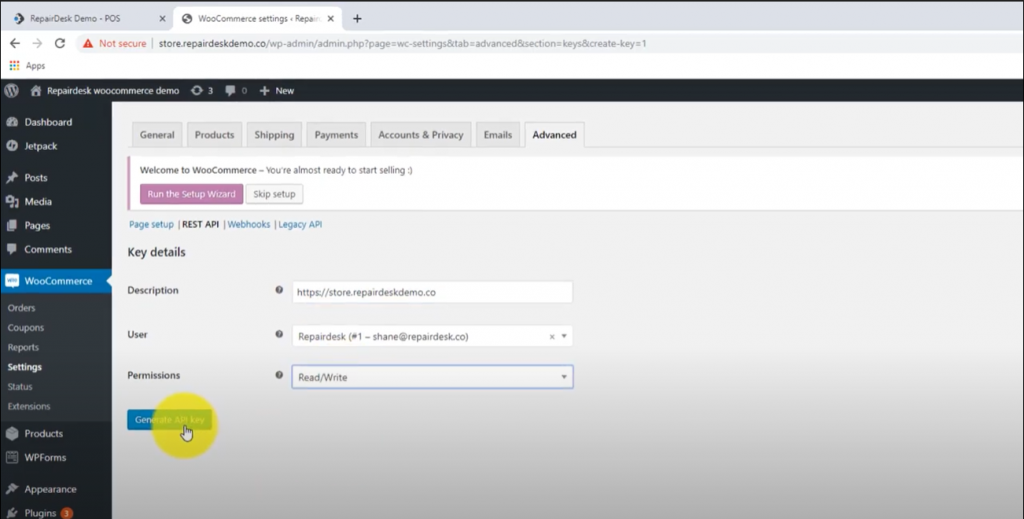
4. In the form that is displayed afterward, add the name of your store in the description and change the permissions to Read/Write. When that is done, press the Create API key button.
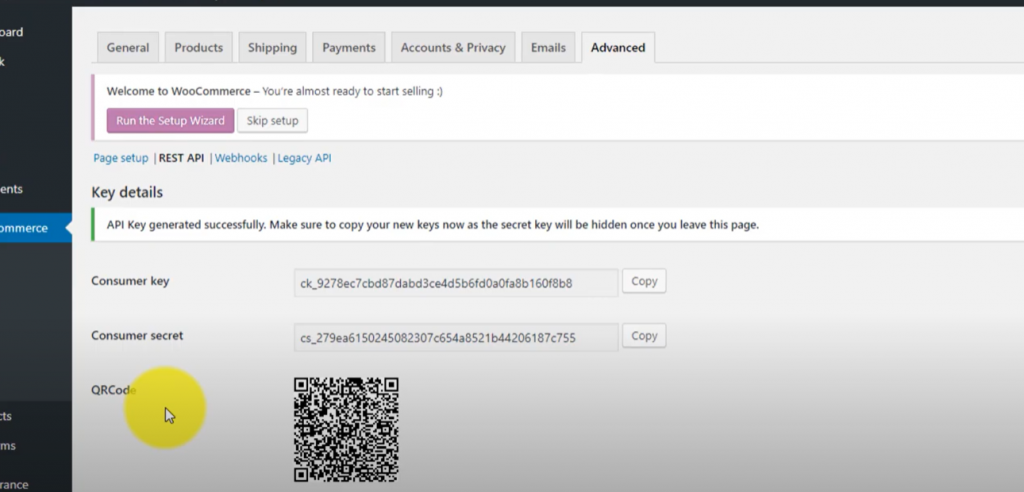
5. You will then be provided with a Consumer key code, Consumer secret code, and a QR Code. These will be vital going forward. It is important to remember that, for security purposes, if you leave this page, you will lose access to these keys. You will then have to recreate the current API.
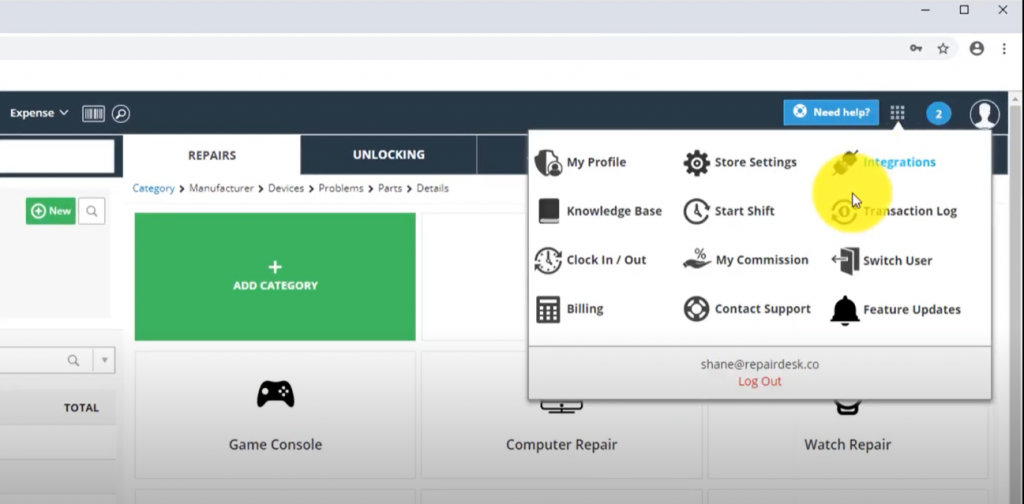
6. When all that is done, log in to your RepairDesk Classic account on a different tab on your browser. Once in, click on the square dotted icon on the header next to your profile icon. On the dropdown that appears, choose the Integrations option.
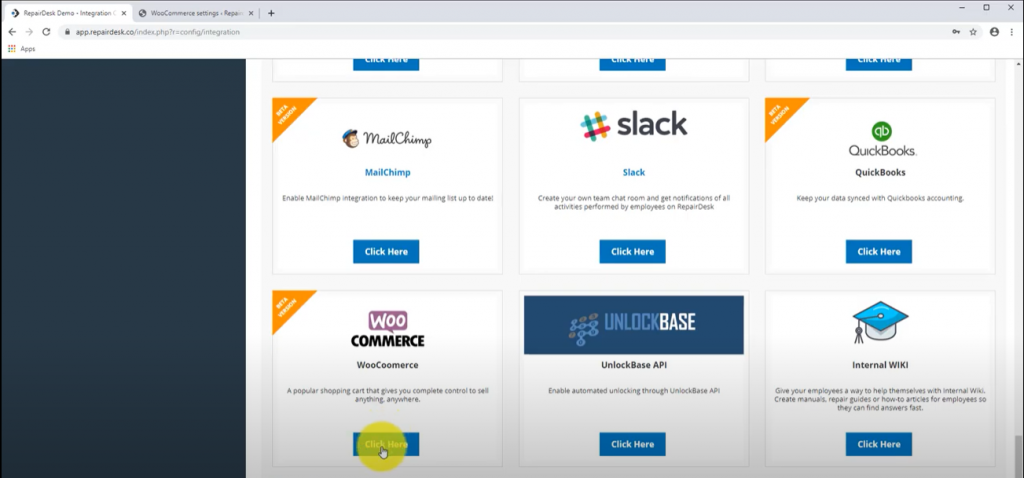
7. You will be directed to the integrations page, where you must scroll down to find the one you are looking for. Select the WooCommerce integration from there.
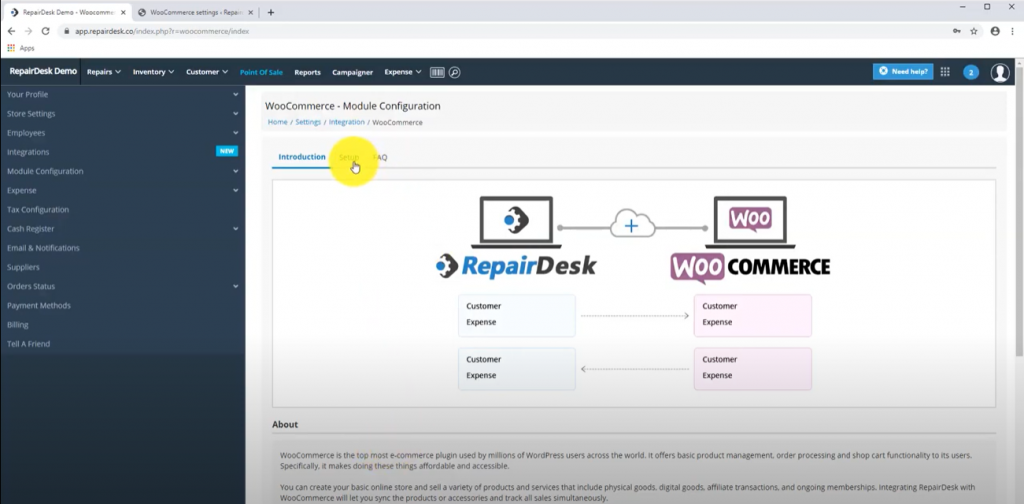
8. This will lead you to the WooCommerce Module Configuration page. Shift to the Setup tab on the page there.
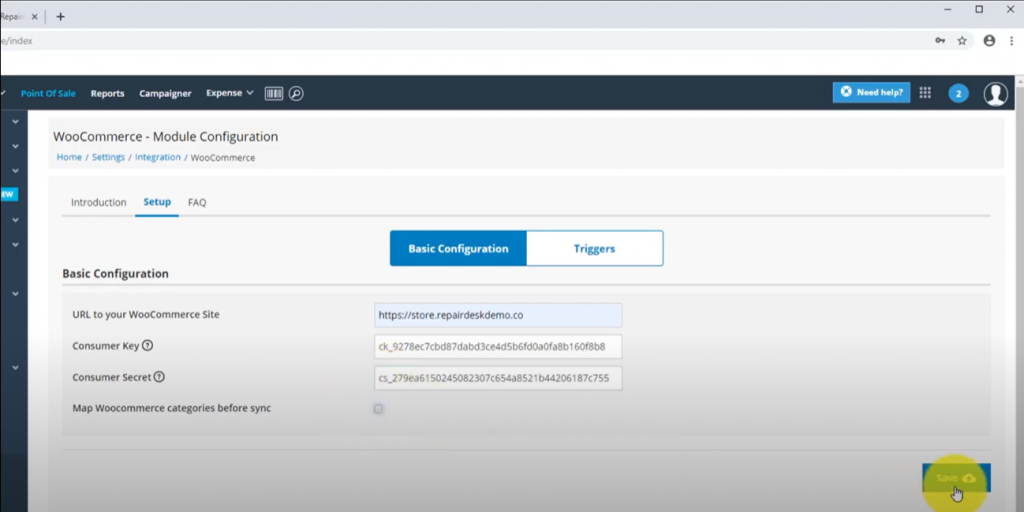
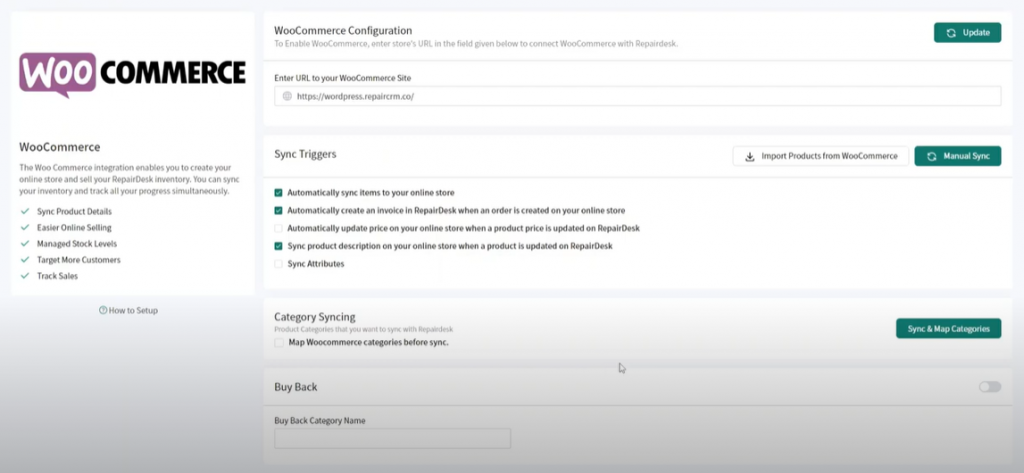
9. Under the Basic Configuration option, enter the exact URL of the website where WooCommerce is implemented. Now you must copy the Consumer key code and Consumer secret code from earlier and paste them into their respective fields. You can even import your WooCommerce catalog from your website into RepairDesk here by choosing to Map WooCommerce categories before sync. Once you are done, hit save to confirm your changes.
And that’s your WooCommerce integrated with your RepairDesk Classic!
Integrating WooCommerce Webhooks on RepairDesk Classic
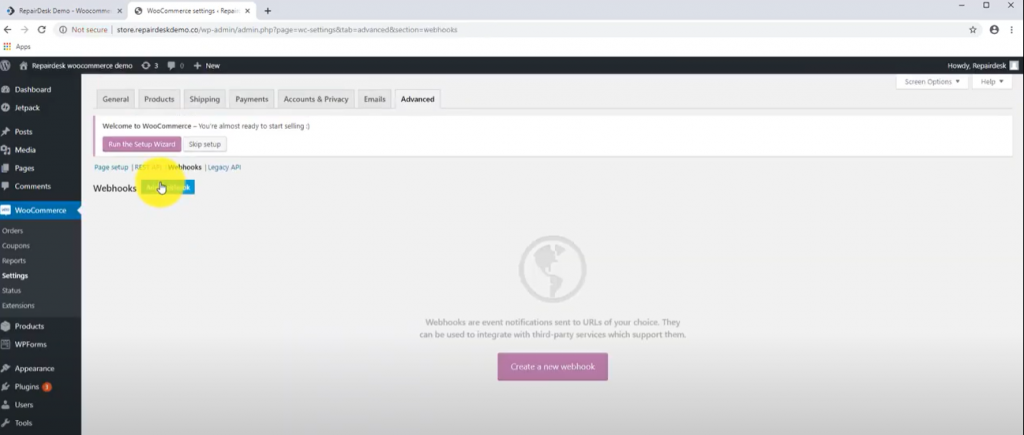
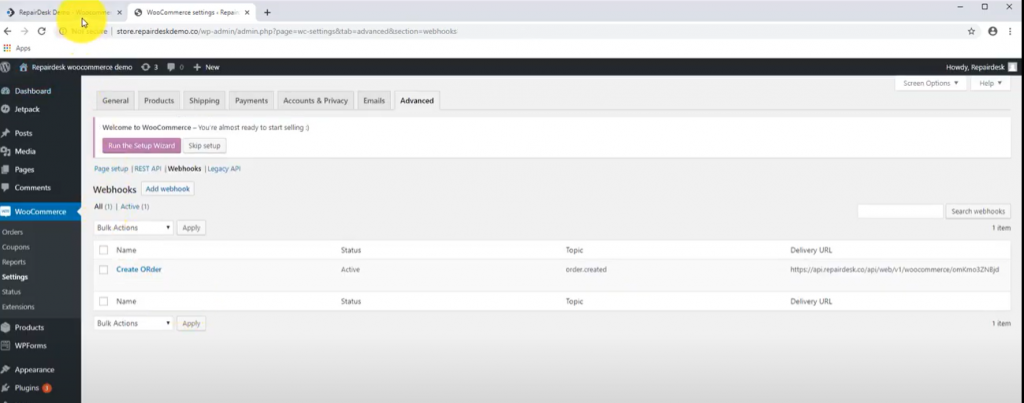
But if you want to relay your actions between the platforms, you must set up your Webhooks as well. If these are not properly set up, your changes on either platform will not be fully synced with the other. So, basically, without these, your integration would be as good as useless. So be sure you’ve set them up the right way. From the WooCommerce tab in your WordPress account, go to Settings and then the Advanced tab there. Click on the Webhooks option right next to the REST API option.
Here you can choose the buttons Create a new webhook or Add webhook.
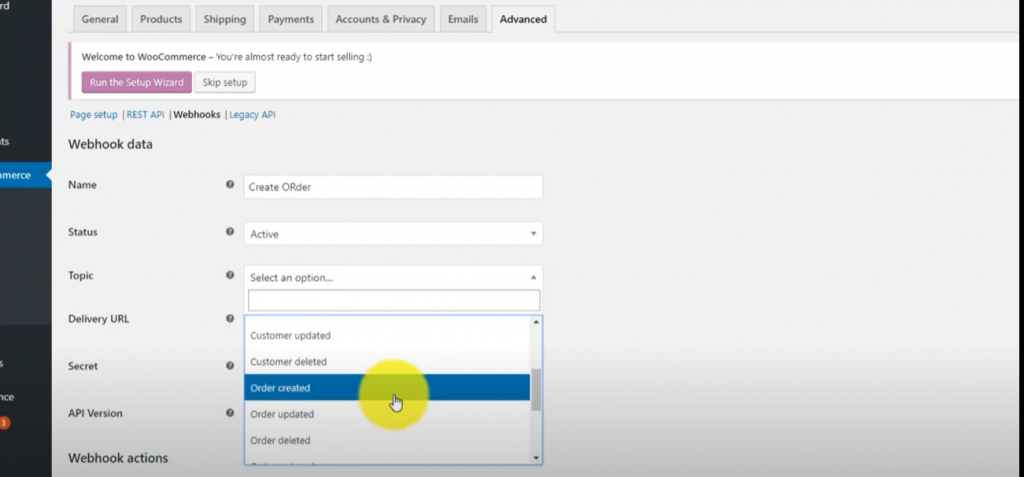
It will direct you to the Webhooks data entry form. When picking the name for your Webhook, ensure that it is something convenient like “Create Order”. Then change its status to Active. From the Topic option, select the action you would like to perform with the Webhook, for example, Order created.
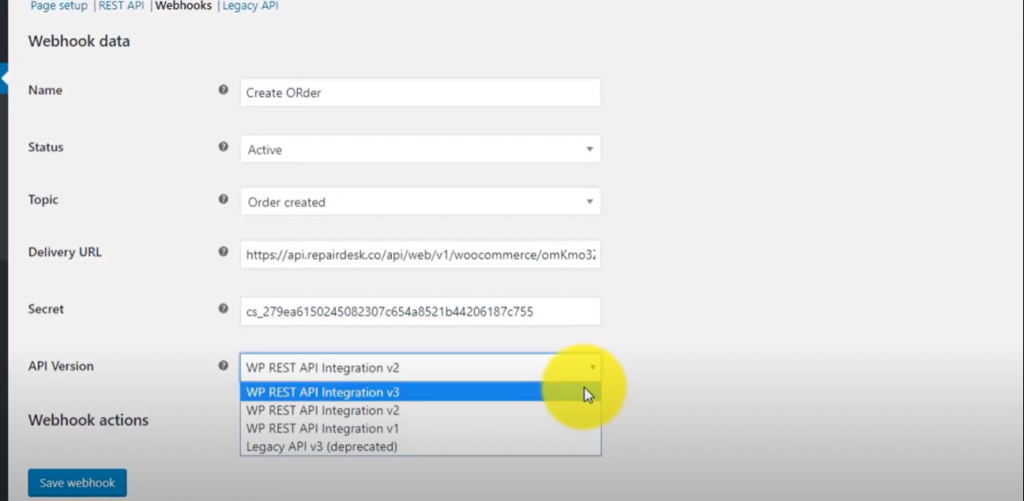
Then change to the tab on your browser where you have your RepairDesk account open. From the WooCommerce page, go to the Setup tab. Here locate the Webhook URL and copy it. Now move back to the WordPress page and paste the copied URL in the Delivery URL field on the form. Next, copy the Consumer Secret code and paste it into the Secret field on the form. Set the API Version to the latest one available. Then just click the Save webhooks button.
This Webhook should now appear in the list. You can create as many Webhooks as you need for however many functions you need to perform. The recommended ones are, of course, Order created, Order updated, and Product created.
And just like that, you are good to go! But that’s for RepairDesk Classic, but what about RepairDesk 2.0? Well, we’re getting to that now.
Integrating WooCommerce with RepairDesk 2.0
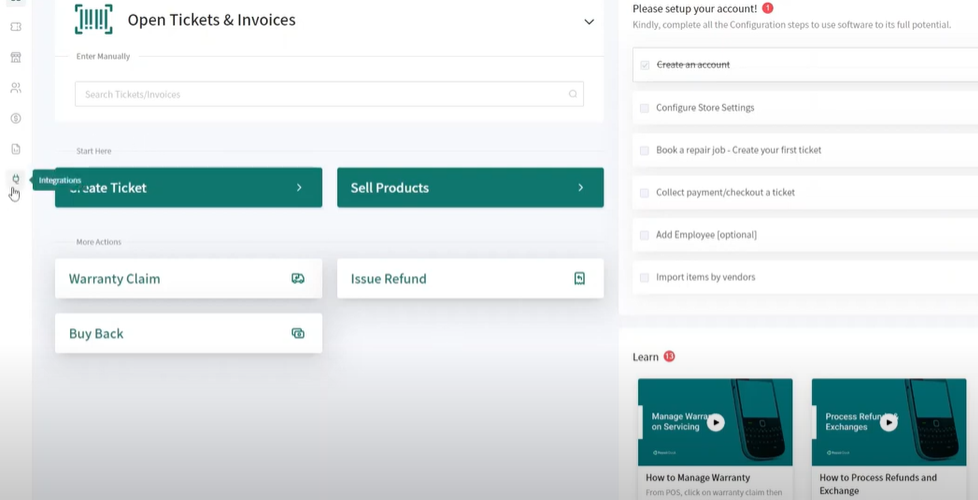
1. To start, log into your RepairDesk 2.0 account and select Integrations from the lefthand bar.
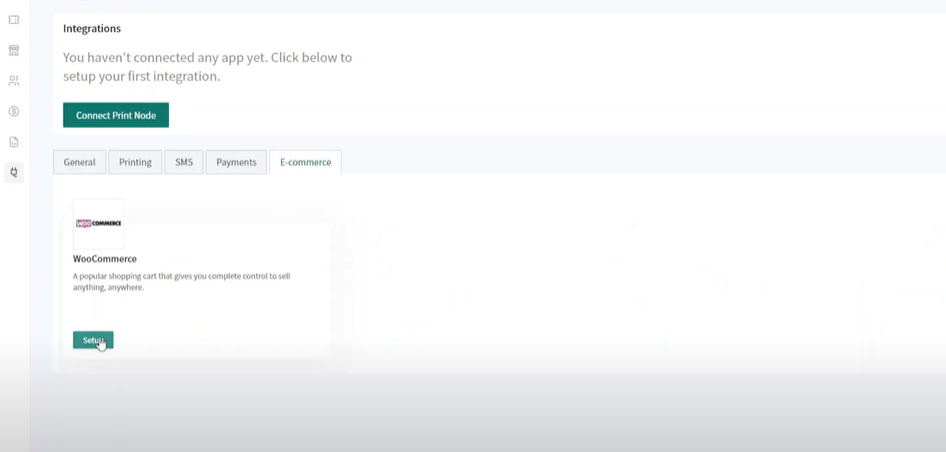
2. This will lead you to the Integrations page, where you must go to the E-commerce integrations tab. Here, head on over to the WooCommerce integration section and click on Set up.
3. On the page this directs you to, you need to enter your WooCommerce website URL in the text field. Once done, press the Connect button on the top-right corner.
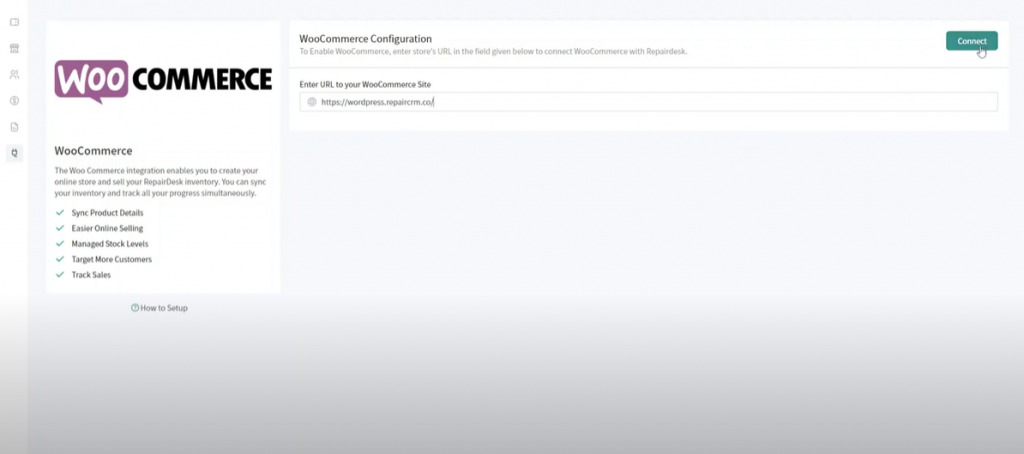
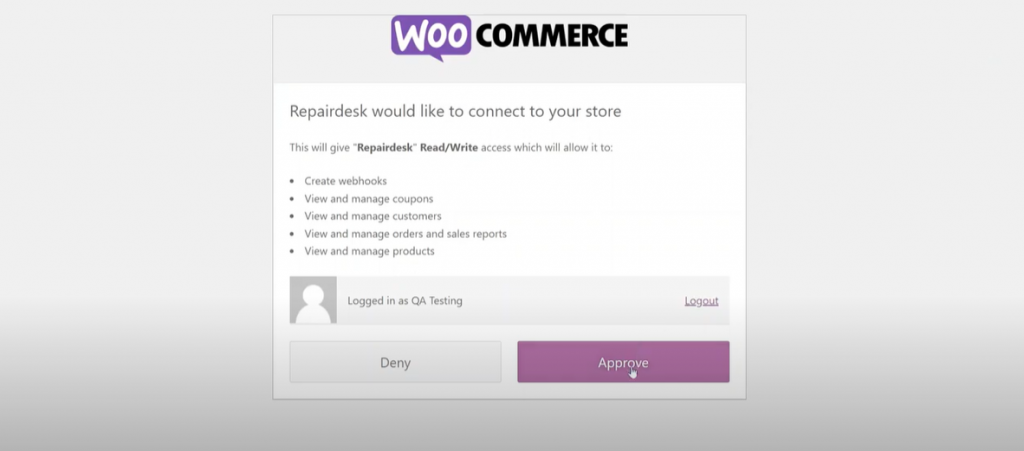
4. Then you will then be taken to a page where you will be asked to approve your WooCommerce connection. Click on the Approve button to proceed with the integration process.
5. Then you will be directed back to RepairDesk, with multiple new options at your disposal now.
Using WooCommerce on RepairDesk 2.0
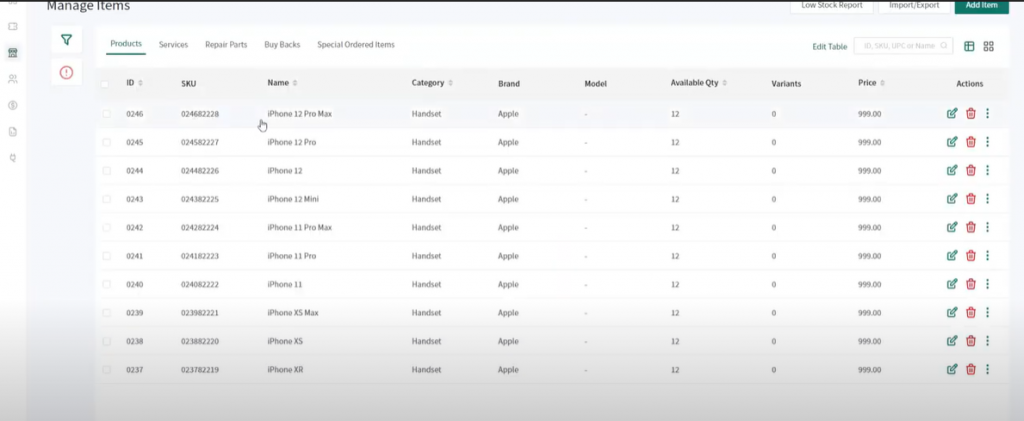
On the left-hand bar on your RepairDesk, go to Items and click on Products from there.

This will lead you to a screen with your product list. Here, pick on the item you would like to show in your online store.
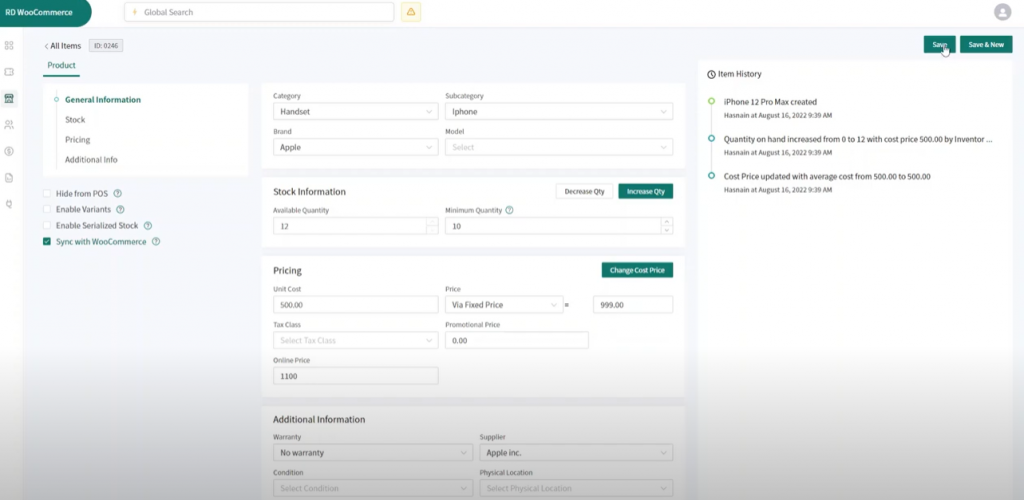
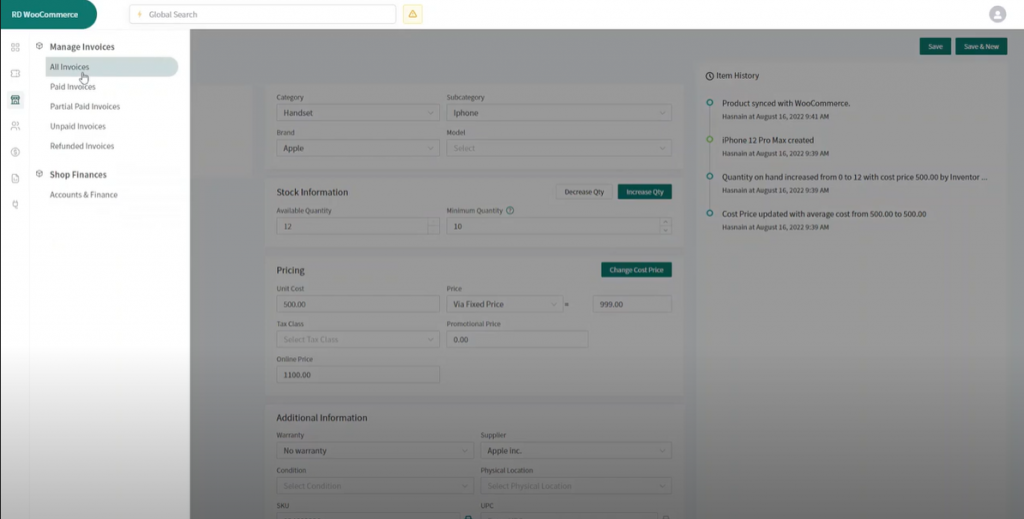
When you click on it, it will lead you to the product page. There, select the Sync with WooCommerce option on the left-hand side to enable it.
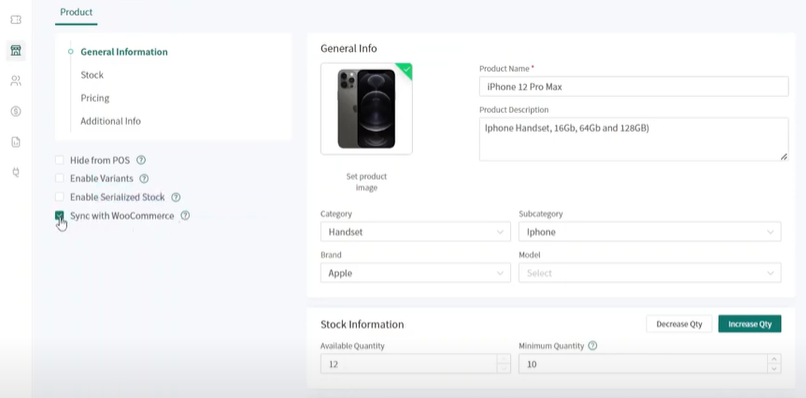
Then you must set the online price for the item. To do this, scroll down until you find the Online Price field and type out the desired amount. Once you have done that, click on the save button in the top-right corner of the page.
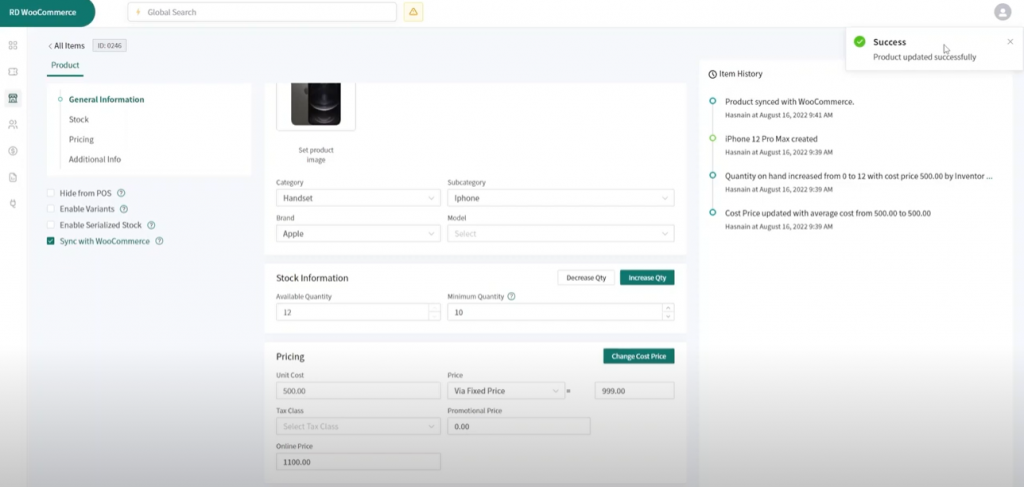
You will then receive a notification letting you know that your update has been successful. And on the right-hand side, in the Item History log, you will be able to see that the Product synced with WooCommerce.
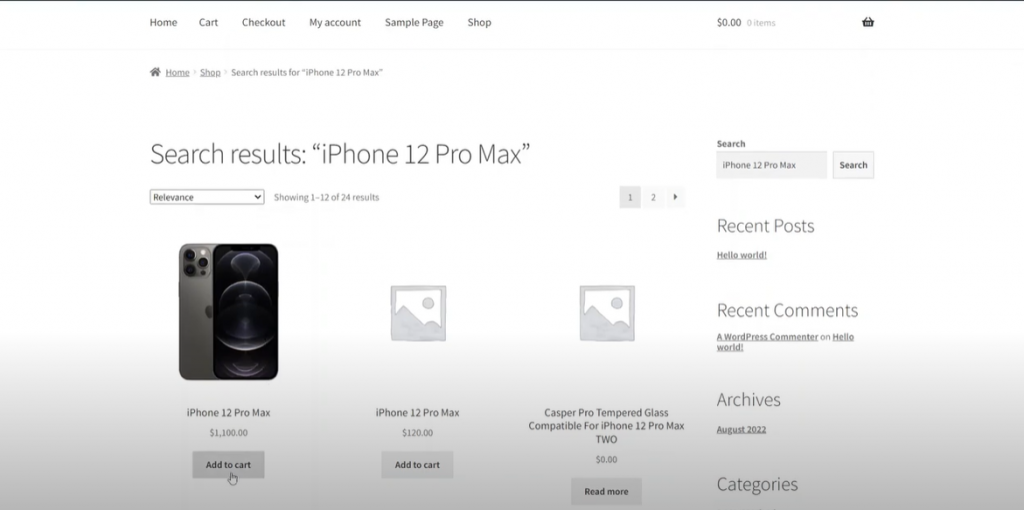
Now over on your WooCommerce website’s WordPress backend, head to the WooCommerce section on the left-hand bar and select Products. Then click on the Search Product button to refresh your product list there. You will find the same item you had in your RepairDesk 2.0 here, with the same price that you entered earlier.

To be really thorough, you can even go over to your store website and search for your product there. You will find it listed with the same amount.
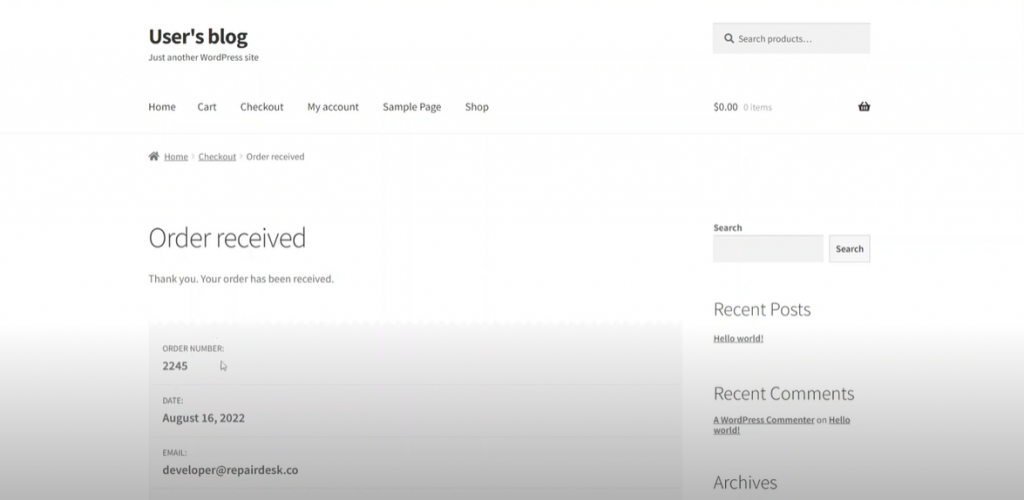
If a customer adds this product to the cart and proceeds with the checkout process, they can see their Order Number with the order information on the website.
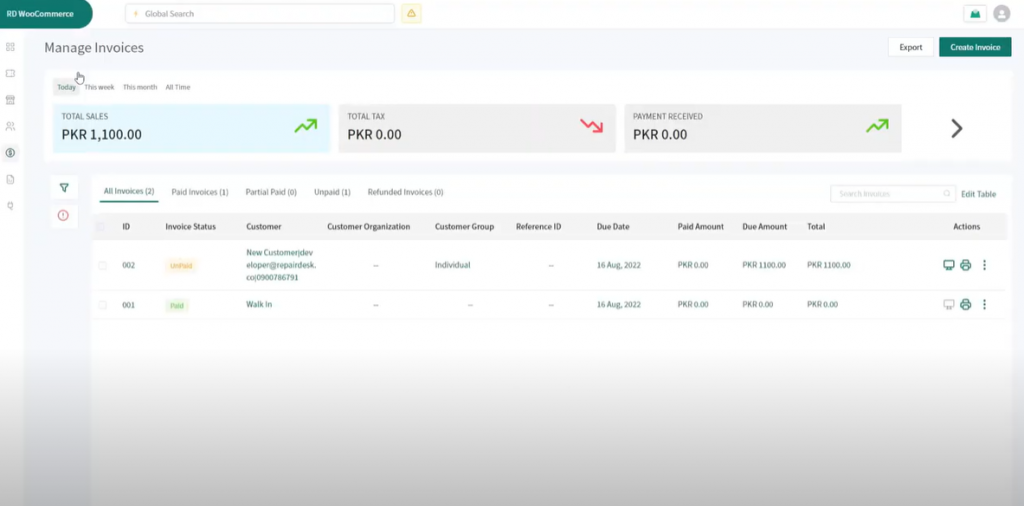
Next, if you go back to RepairDesk and select the Finance section on the left-hand bar, and then select All Invoices, you will be able to see a new entry added.
This is for the item you just sold on your website.
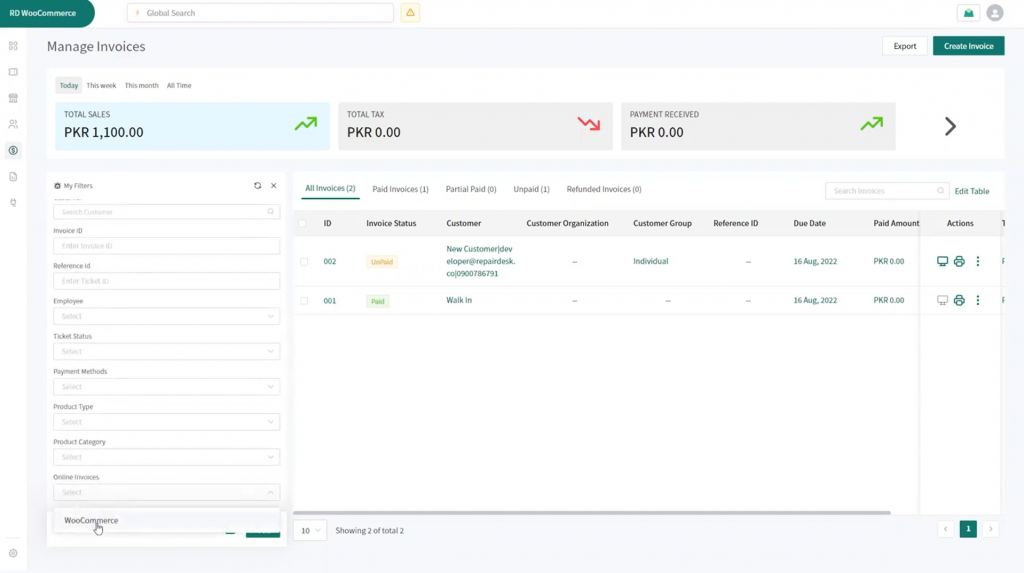
You can even pick WooCommerce from the Online Invoices field in the Filters section that appears on the left-hand side once you click the Filters button. It will narrow down the invoice data shown to just the ones synced via the WooCommerce integration.
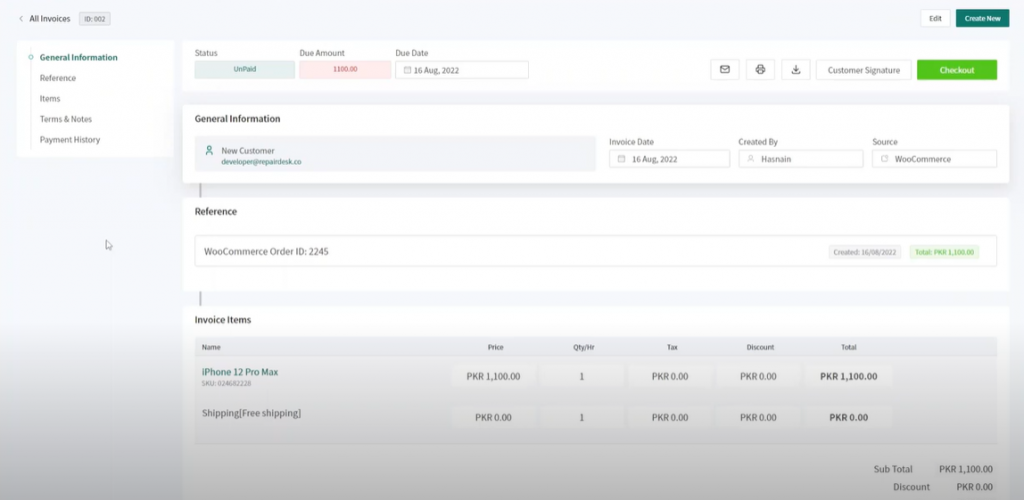
You can click on the entries to see the details. When you open the invoice, you will see that it is recorded as a WooCommerce order, and its order number is the same as the one your customer got on checkout. This means that our systems are now in complete sync with each other.
And that’s how you can take on any order with just one eCommerce integration on your RepairDesk 2.0!
Haven’t tried the RepairDesk POS yet? Change that now by hopping on to the 14-day free trial! You don’t even need to enter a credit card. Woo your clients with our WooCommerce integration on your POS.


